


 Hello everyone, Sry Late post I found an another one awesome thing yes that was how you can create an custom windows 7 installation disk. if you want to save time when installing Windows 7 ? than you can create a customized installation disc of windwos 7 and have it perform an installation without asking you questions, integrate updates and drivers, tweak Windows, and remove Windows components and much more blah blah blah things then this one was very help full for you guys.
Requirements
We use these Two tools for doing this task !
- RT Se7en Lite – if you’ve used nLite with Windows XP or vLite with Windows Vista in the past, it works similarly. RT Se7en Lite is a sort of vLite or nLite for Windows 7.
- Windows Automated Installation Kit (WAIK) for Windows 7 from Microsoft – RT Se7en Lite is a more user friendly frontend to WAIK.
Now Lets Start Creating a Custom Windows 7 Installation Disk
First you have to download & Install Windows Automated Installtion kit (WAIK) For windows 7 from microsoft This is about 1.7 GB, so the download may take a while if you have a slow Internet connection. After downloading it, extract it with a file extraction program such as 7-Zip.

Now run the StartCD.exe file, select Windows AIK Setup, and follow the instructions on your screen to install Windows AIK.

And you will also need a Windows 7 installation source – either a physical disc or ISO file.
Now next, step was downloading and installing RT Se7en Lite from here – it’s free and donation-supported. Download the appropriate version for your version of Windows — x86 if you’re using a 32-bit version of Windows or x64 if you’re using a 64-bit edition.
Now Run RT Se7en Lite and click the Browse button and provide your Windows 7 files – if you have an ISO file on your hard drive, click Select ISO file and navigate to it. If you have a Windows disc, insert the disk, click Select OS path, and navigate to the disc.

If you provide an ISO, you’ll have to specify an extraction path where the ISO’s files will be extracted to – you’ll need several gigabytes of space on your hard disk for this.

The files will be automatically extracted after you provide your ISO. After selecting the edition of Windows 7 you’re customizing, RT Se7en Lite will load the image. If you have a Windows 7 disc without Service Pack 1 integrated, click the Slipstream Service Pack option in the “Select an image to configure” window and you’ll be able to integrate SP1.
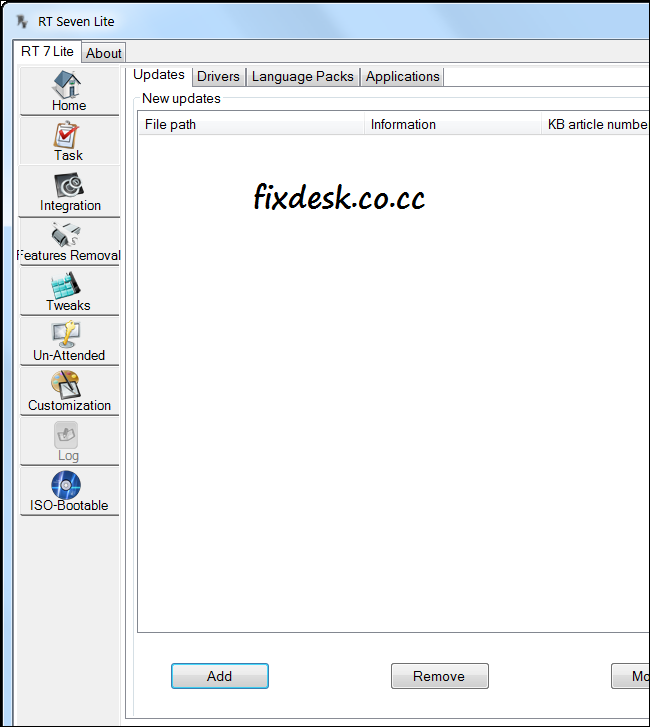
Click over to the Task pane and select the tasks you want to perform after the image is loaded. You can manually check the check boxes or select a preset. Selecting one of the check boxes will activate the corresponding configuration pane at the left side of the window.

The integration pane allows you to integrate Windows updates, drivers, language packs, and even third-party applications into your installation disc. To integrate updates, you’ll have to download their installer files and load them into RT Seven Lite with the Add button.
On the Features Removal or Components tab, you can permanently remove components from your Windows installation disc and control which Windows features are installed by default. For example, you can remove the included games from your Windows installer disc, or force Windows to install the IIS web server by default.

The Tweaks tab allows you to customize the default settings for the Windows Control Panel, Desktop, Explorer, and a variety of other Windows components. You can even add custom registry settings to tweak other settings that aren’t present in the list.

The Unattended section allows you to create an unattended installation disc – you provide answers to installation questions beforehand and Windows will install without asking you these questions during the installation process.
For example, you can enter your product key ahead of time so Windows won’t ask you for it. The other tabs allow you to control other settings – for example, selecting the hard disks that Windows will install on. If you complete enough of these settings, Windows will install automatically without asking you any questions during the installation, allowing you to perform an unattended Windows installation.

The Customization pane allows you to add custom screen savers, wallpapers, themes, documents, and even log on screens to your Windows 7 disc.

On the ISO Bootable pane, This was the final step where you can create a ISO image from your customized installation disc. You can also burn it to a DVD or copy it to a bootable USB drive.

And guys before you use it on a physical computer, just to make sure everything is working properly.On a virtual machine you can use VirtualBox or VMware Player to do this – both are free. if you got any error or questions leave it on comment and must share with you frends Best Of Luck For Your Disk !!! :)

0 comments:
Post a Comment
What's on your Mind Say it below